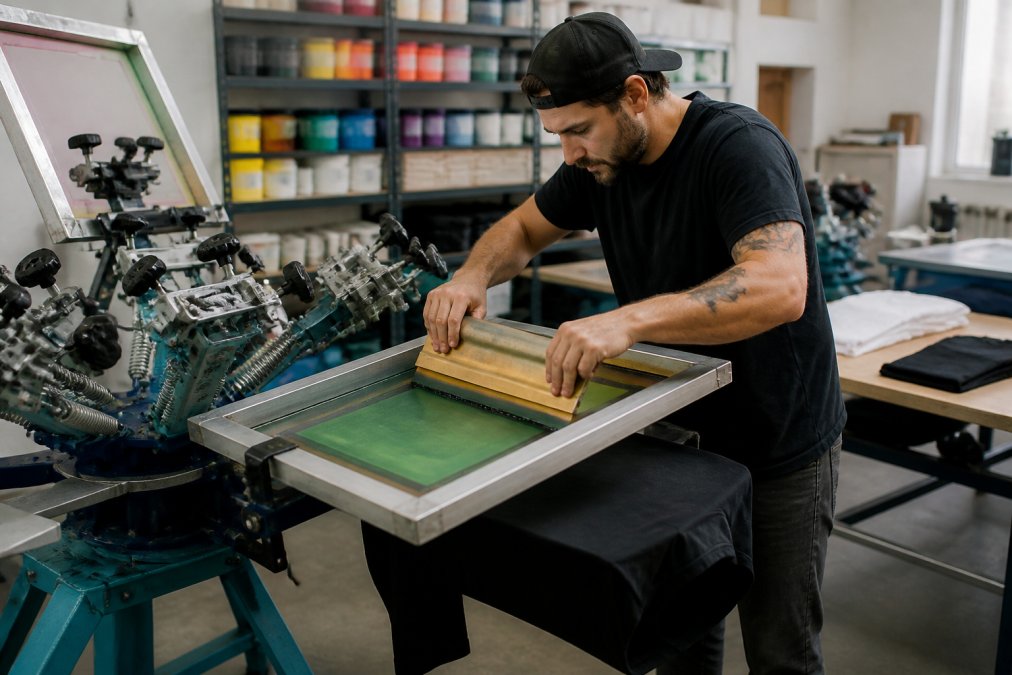
 ultimate-guide
How to Start a Clothing Line with Screen Printing
Table of Contents
- What You Need Before Starting Your Screen Printing Clothing Line
- Best Screen Printing Equipment for Beginners
- Step-by-Step: How to Screen Print Your First Shirts
- How to Prevent Custom Shirt Prints from Cracking
- Clothing Brand Startup Costs and Budgeting
- Sourcing Apparel, Building a Brand, and Marketing
- Conclusion
- Frequently Asked Questions
Last Updated: September 6, 2026
Starting a clothing brand is a dream for many, but the gap between sketching a logo and shipping a finished shirt stops most people cold. Screen printing remains the most cost-effective way to produce durable, vibrant apparel at scale, and learning how to start a clothing line with screen printing is more accessible now than ever. This guide breaks down the equipment, technical steps, and business decisions you need before your first production run.
What You Need Before Starting Your Screen Printing Clothing Line
Starting a clothing line with screen printing requires more than a good design; it demands a clear brand identity, a defined niche market, and a realistic production workflow. Before spending on equipment, answer three questions: Who is your customer, what is your brand story, and can you produce professional-quality prints?
Most beginners underestimate the learning curve. The process involves preparing vector graphics, separating colors, coating screens with emulsion, and curing ink correctly, mastering these fundamentals takes weeks of practice, not days. A streetwear label approach differs significantly from team uniforms or corporate merch.
A common mistake is skipping the design preparation phase. Screen printing does not handle gradients or fine details the way digital printing does. You need bold, separated artwork ready for production. The U.S. Small Business Administration's guide to business planning stresses that a solid operational plan, including your production method, is critical before you invest in inventory or equipment.
Best Screen Printing Equipment for Beginners
The best beginner equipment focuses on a few essential tools rather than an automated production line. A functional home-based print shop needs a manual press, an exposure unit, and a heat source for curing, enough to print single-color designs immediately and expand to multi-color work as skills grow.
Manual Press, Exposure Unit, and Mesh Counts
A manual press is your workhorse; a 1-color or 2-color press is sufficient to learn registration and flooding. You will also need an exposure unit to burn your design onto the screen and a washout booth to rinse away unexposed emulsion.
Mesh count determines detail and ink deposit. Lower counts, like 110, deposit thick plastisol ink layers for bold text and solid graphics on dark garments; higher counts, such as 156 or 200, suit detailed designs and water-based ink. Selecting the right mesh prevents ink bleeding or clogged details.
Step-by-Step: How to Screen Print Your First Shirts
The actual printing process follows a repeatable sequence: prepare the file, burn the screen, print the shirt, and cure the ink. Each step has specific parameters that affect final quality and durability. This section breaks down the process with the technical specifics you need to avoid common beginner failures.
Preparing Design Files and Color Separation
Your design file must be converted to vector graphics and separated by color. For a single-color print, you need a high-contrast black and white image. For multi-color jobs, each color requires its own screen, registered to align perfectly with the others.
Use vector editing software like Adobe Illustrator or Affinity Designer; raster images from the web lack resolution for crisp prints. Screen printing uses spot colors, not process colors like your monitor, so match brand colors to a pantone system for consistency across runs.
Avoid gradients or fine halftones on your first run; stick to bold, 2-3 color designs with clear separation. If you must print a gradient, convert it to a halftone pattern, requiring a higher mesh count (200 or higher) and a finer squeegee angle. Simplify artwork for your first few runs to build skills.
Coating, Exposing, and Washing Out Your Screen
This step occurs in a darkroom or under safe lighting. Coat your screen with photosensitive emulsion and let it dry completely in a dark, dust-free area, a typical diazo emulsion needs 1-2 hours. Place your transparent film positive on the screen and expose it; the light hardens the emulsion where not blocked by your design.
Exposure time is the most variable parameter. A common starting point with a 5000-watt unit is 45-60 seconds, but you must test. Create a step-wedge test by covering your screen with cardboard and exposing in 10-second increments to find the minimum time needed to harden the emulsion without losing detail.
After exposure, wash the screen with water; the unhardened emulsion washes away, leaving a stencil. Underexposure causes the stencil to wash away completely, while overexposure makes it impossible to wash out fine details. Test exposure times to find the sweet spot for your emulsion and light source.
Printing, Curing, and Wash Testing
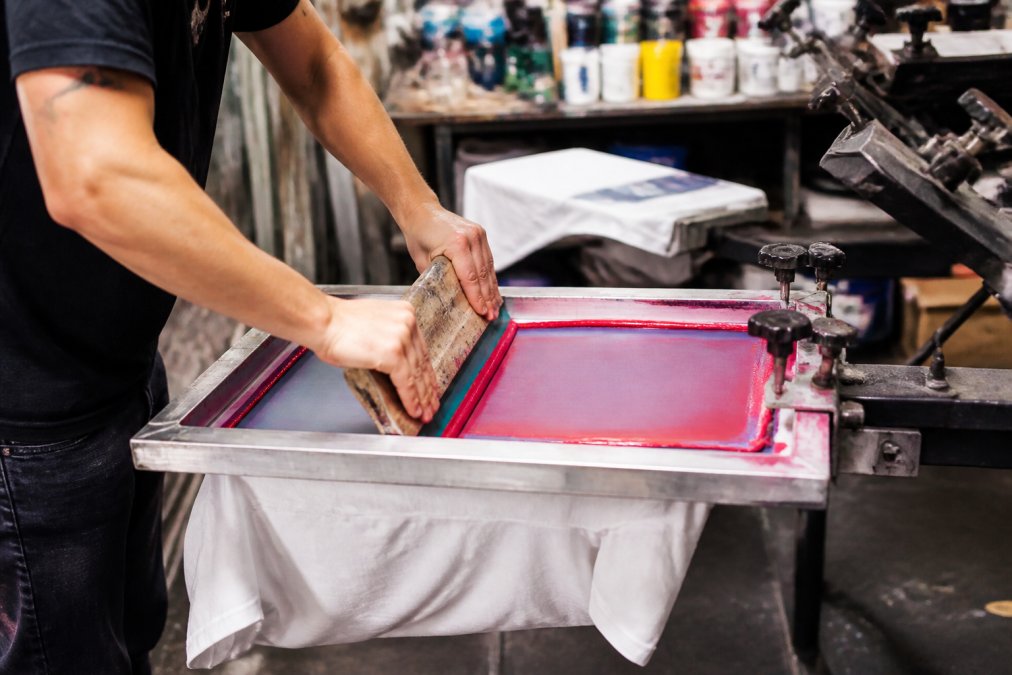
Secure your garment on the platen, place the screen on top, add a line of plastisol ink, and pull the squeegee toward you with firm, even pressure, a print stroke. Use a flood stroke to push ink back across the screen before the next print. A 45-degree squeegee angle deposits more ink; a steeper angle deposits less.
Curing is the most critical step for durability. Plastisol ink must reach 320°F (160°C) to fully bond with fabric fibers; undercured ink will wash out or crack prematurely. Use a heat press (set to 350°F for 15-20 seconds) or a conveyor dryer, the latter is faster for larger runs but requires more space and investment.
After curing, perform a wash test on a sample shirt to verify the print holds up to laundering. Wash it in hot water and dry it on high heat. If the print cracks or fades, your cure temperature or time is off. OSHA's guidelines on workplace safety for manufacturing operations highlight that proper ventilation and heat management are essential when working with curing equipment and chemicals.
Troubleshooting Common Print Failures
Even with careful technique, issues will arise. Here are the most common failures and fixes:
- Ink bleeding or spreading: This is usually caused by using too low a mesh count for the detail level or applying too much pressure. Switch to a higher mesh count (156 or 200) and reduce your squeegee pressure.
- Pinholes in the print: These are tiny dots of missing ink, caused by dust or debris on the screen before coating, or by an uneven emulsion coat. Re-coat the screen, ensuring a clean surface, and use a scoop coater for an even layer.
- Ghost images or stencil breakdown: This happens when the emulsion is underexposed or when you use aggressive screen cleaner. Increase exposure time and switch to a gentler, emulsion-safe cleaner.
- Colors not aligning (misregistration): This is a mechanical issue. Check that your screen is locked into the press correctly and that your film positives are placed in the exact same position on each screen. Use registration marks on your film to align them visually.
Mastering these troubleshooting steps saves hours of frustration and wasted material. The difference between a professional print and a failed one is often a 10-second change in exposure time or a 5-degree shift in squeegee angle.
How to Prevent Custom Shirt Prints from Cracking
The primary cause of cracked prints is undercuring, but ink quality and fabric choice also play significant roles. Ensure the ink reaches its full curing temperature for the correct duration. A heat gun with an infrared thermometer is a worthwhile investment to verify the temperature on the shirt surface, not just the air around it.
Ink layering also matters: thick layers are more prone to cracking because they are less flexible. Use a higher mesh count to deposit a thinner layer, or add a stretch additive for stretchy fabrics like tri-blends. Always use a quality garment, printing on a cheap, rough shirt causes ink to sit on the surface rather than bonding with fibers.
Clothing Brand Startup Costs and Budgeting
Budgeting requires separating initial equipment costs from per-unit production costs. Equipment is a one-time investment, while apparel blanks, ink, and emulsion are recurring expenses that scale with order size.
Startup costs vary widely based on whether you buy new or used equipment and the complexity of your setup. A basic manual setup can be assembled for a modest investment, but professional-grade equipment costs significantly more. Beyond equipment, your budget must include apparel blanks, screens, squeegees, and marketing materials. The IRS's guidance on small business expenses and deductions can help you understand which of these startup costs are deductible as business expenses, which is crucial for your cash flow.
| Expense Category | What It Includes | Budgeting Tip |
|---|---|---|
| Core Equipment | Manual press, exposure unit, heat source | Buy used to save on initial outlay |
| Consumables | Screens, emulsion, squeegees, tape | Budget for replacement and waste |
| Ink & Chemicals | Plastisol or water-based ink, cleaner | Start with basic colors and mix your own |
| Apparel Blanks | T-shirts, hoodies, garment sourcing | Order samples before bulk purchasing |
| Business Setup | Licenses, website, marketing strategy | Allocate funds for branding and photos |
Sourcing Apparel, Building a Brand, and Marketing
Your business model hinges on your sourcing strategy: buy wholesale blanks and print in-house, or use print-on-demand for fulfillment. In-house printing offers higher margins and quality control but requires inventory management; print-on-demand eliminates inventory risk but reduces margins and quality control. This section covers managing stock for a small-batch clothing line, a topic most guides ignore, along with core branding and marketing steps.
Inventory Management for Small-Batch Drops
If printing in-house, you are likely operating on a drop model: releasing a limited quantity of a design, selling out, then moving to the next. This creates a unique inventory challenge, you need enough stock to fulfill orders without tying up all your cash in unsold shirts.
A common pattern for successful small-batch streetwear brands is to print a pre-determined quantity, say, 50 to 100 units per design, and track sell-through rates. If a design sells out in 48 hours, you have a winner and can reprint; if it takes two weeks to sell 50 units, your audience is smaller and you should print fewer next time.
Use a simple inventory tracking system, a spreadsheet can work initially, but as you grow, consider Shopify's inventory features or a dedicated app like Stocky. Track not just how many shirts you have, but which sizes are moving. A common mistake is printing equal quantities of each size, only to find medium and large sell out while small and extra-large sit on the shelf.
A practical rule of thumb for sizing distribution on a typical unisex t-shirt is roughly 40% medium, 30% large, 20% small, and 10% extra-large. Adjust based on your audience, a women's cut may skew smaller, while a gym audience may need more large and extra-large.
Sourcing Apparel Blanks Strategically
Your choice of blank garment is a brand decision. For a premium streetwear drop, choose a heavyweight t-shirt like the Bella+Canvas 3001 or a substantial hoodie like the Independent Trading Co. SS4500. For a budget-friendly option, the Gildan 5000 is a workhorse, but it has a different hand-feel and drape.
Order samples of every blank before committing to a bulk order. Feel the fabric weight, check the fit, and test-print on it. A shirt that feels great in the package may shrink or warp after the first wash, so wash-test your samples to ensure the blank holds its shape and color.
When you find a blank that works, build a relationship with a wholesale distributor. Companies like S&S Activewear, SanMar, and Alpha Broder offer a wide range of brands with tiered pricing based on volume. Ordering in bulk (e.g., 100+ units) unlocks a lower per-unit price but ties up more cash in inventory, balance per-unit savings against cash flow needs.
Building a Brand and Marketing Your Drops
Building a brand requires a consistent identity and clear marketing strategy. Your niche market should dictate your design aesthetic and apparel blanks, streetwear might focus on heavyweight hoodies and oversized tees, while corporate clients need professional uniforms and polos.
Marketing a small-batch clothing line is about creating hype and scarcity. Tease a drop on social media (Instagram and TikTok are primary channels) with behind-the-scenes printing content to build anticipation, then announce a specific drop date and time. When the drop goes live, ensure your e-commerce platform can handle the traffic.
Email marketing is underutilized but highly effective. Build an email list from day one, offering a small discount (e.g., 10% off) for signup. For each drop, send a teaser email 48 hours in advance and a launch email at the exact drop time, this creates a direct line to your most engaged customers.
When you are ready to scale beyond your own capacity, consider how you will handle larger orders, this is where a professional partner becomes invaluable. Action Designs specializes in scalable production, offering screen printing, embroidery, DTG, and DTF. We handle everything from single shirts to full collections, with the flexibility to supply garments or customize client-provided items, allowing you to focus on design and marketing while we manage production and quality control.
Conclusion
Launching a clothing line is a blend of artistic vision and operational discipline. You must master the technical craft of screen printing while managing the business realities of sourcing, budgeting, and marketing. The path is challenging, but seeing your designs worn by real people makes the effort worthwhile.
To truly prevent custom shirt prints from cracking and ensure your garments meet professional standards, you need a production partner you can trust. Action Designs provides high-quality, durable, and vibrant custom apparel for businesses and individuals alike, from professional branding for logos and uniforms to cost-effective marketing merchandise. Get a quote today and let us help you bring your clothing line to life.
Frequently Asked Questions
Is screen printing t-shirts profitable?
Yes, screen printing can be profitable, but your margins depend on your business model and volume. Selling printed shirts at retail prices yields much higher margins than doing contract printing for other brands. Your profit is tied to your shirt costs, ink, and labor. Keep your initial overhead low by starting small, and focus on a niche market or a signature design to build demand before you scale up production.
Do I need an LLC to start a clothing line?
You don't need an LLC to start, as you can operate as a sole proprietor. However, forming an LLC is a smart step because it separates your personal assets from your business liabilities. This protects you if you ever face a lawsuit or unpaid debt. Registering an LLC is straightforward and costs between $50 and $500 depending on your state. Do this before you sign contracts or hire anyone.
What is the best way to prevent custom shirt prints from cracking?
Cracking happens when the ink film is too thick or not cured properly. To prevent it, use the correct mesh count for your design, which controls ink deposit. Always cure the plastisol ink at the manufacturer's recommended temperature, and verify it with a temperature gun. Finally, wash test a sample shirt before you run a full batch to confirm the print holds up.
What is the easiest way to start a clothing line?
The easiest way is to start small with a limited color palette and simple designs. Instead of buying a full print shop, you can begin by having a professional service like Action Designs print your first small batch. This lets you test your designs and build an audience without a large upfront investment. Once sales confirm your concept, you can then decide if investing in your own equipment makes sense.
Get started with Action Designs and turn your screen printing vision into a professional, market-ready product.